Here we will try to explore how to save a lot of time on CMS deployment. Downloading of CMS, creation of data base, setting limits for users – now all these actions can be automated using specialized tools like ISPmanager hosting panel. And in this article I will show how to deploy a ready to work website based on CMS Joomla. All you will have to do next is just choose a web design and write a unique content for it.
Objectives
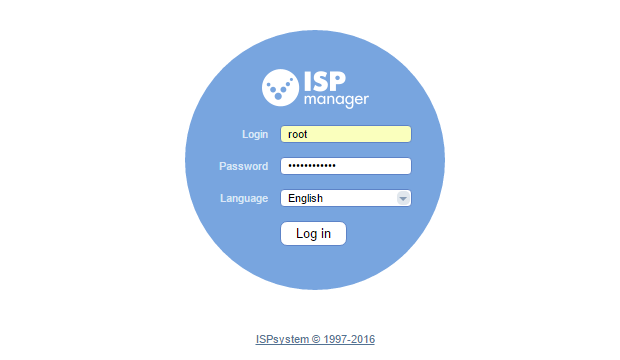
Step 1. Login to your ISPmanager panel.

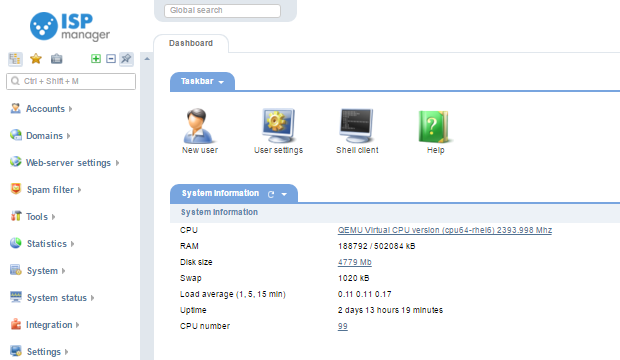
Step 2. After signing in you will see ISPmanager main dashboard with menu on the left and working space on the right, where all manipulations with ISPmanager will take place.

Now let’s get down to the process of site deployment. As the theater begins at the cloakroom, the website begins at the domain name.
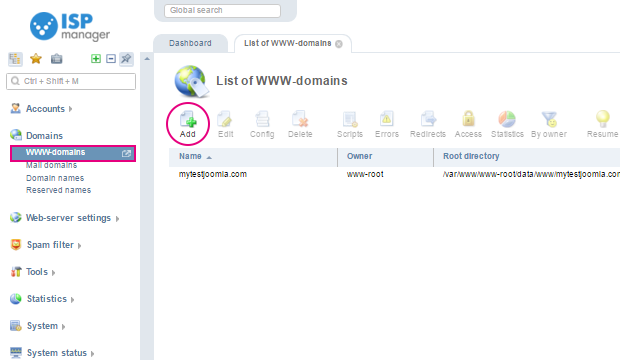
Step 3. To attach your domain to a website, you should click on the item “Domains \WWW-domains ” in the main menu on the left bar and then click on “Add” button to set information about your domain.

Step 4. Complete “New WWW domain” form. All required fields are marked red. Enter your domain name in the first field (in my case it is mytestjoomla.com). After that most of the necessary fields will be completed automatically.

The only thing, which I recommend you to change in the default settings, is encoding. I advise you to choose the UTF8, because it is the most widespread and commonly used one.
Step 5. “In Additional features” section you can for example set PHP version, CGI-scripts, Logging, etc. After everything is dome click OK button on the bottom of the list.

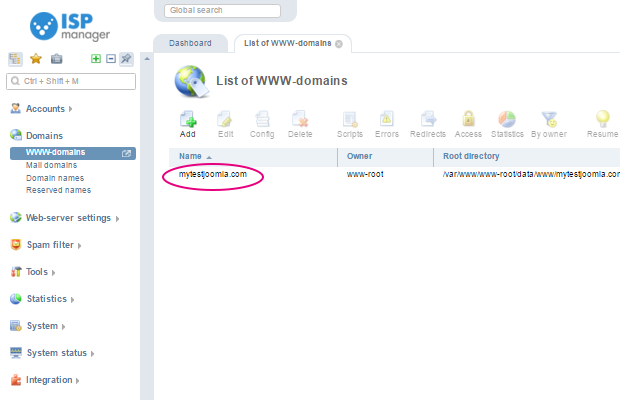
Step 6. As you can see, domain is now in the list. It means that we can move to CMS deployment now


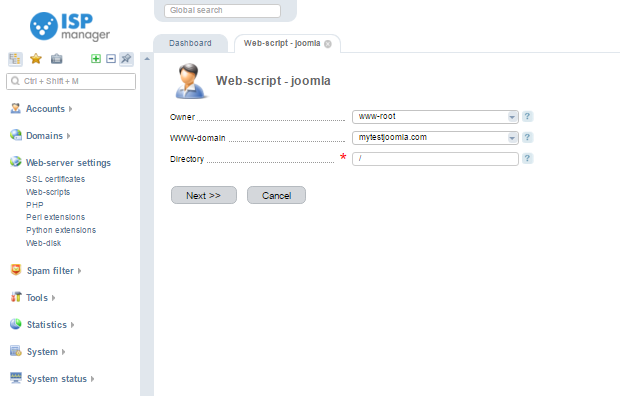
Step 8. On the next screen, which you will see, you will be able to set website’s owner (in my case it is WWW-root), the domain, which will be used for Joomla installation and the folder where your website will be located. Complete these forms and click “Next” button.

Step 9. After short waiting you will see license policy screen. Check “I have read and agree…” box and scroll the screen a bit – there will be important CMS setup fields. Fill admins login and password, his email and the title of website. Select default language. Set an email, which will be used for sending of all system mail. Select what to do with Sample data (it’s a kind of website plug that helps to see where everything be situated on a website)

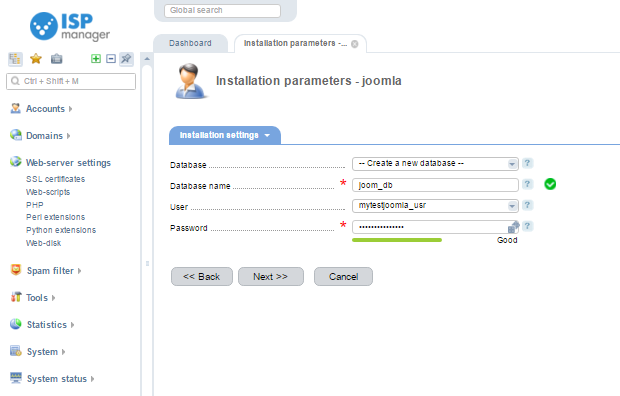
Step 10. The last form which you will have to complete is Database setting. Choose Database’s name ad create a user for it. Click “Next”

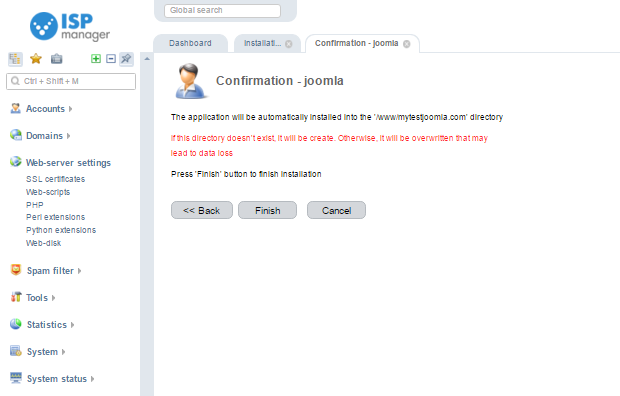
Step 11. Read confirmation and click “Finish” button. That’s it! You are now have fully functional Joomla CMS on your server. If you want to check your website than you just need to enter it´s IP address in the address bar of your web browser (check it on “WWW domains” screen)

Now you have an experience working with ISPmanager and know how to install the most popular content management systems such as Joomla using this hosting control panel. Enjoy!
This post How to Install Joomla on ISPManager-based Server is part of ServerMom.
Objectives
- Logging to ISPmanager control panel
- Domain setup
- Joomla CMS installation
1. Login to ISPManager
As you may already know you will need ISPmanager control panel. You can learn how to install it in the first article about this control panel http://www.servermom.org/ispmanager-review/3117/Step 1. Login to your ISPmanager panel.
Step 2. After signing in you will see ISPmanager main dashboard with menu on the left and working space on the right, where all manipulations with ISPmanager will take place.
2. Creating New Website
This means we will add new domain name into ISPManager.Now let’s get down to the process of site deployment. As the theater begins at the cloakroom, the website begins at the domain name.
Step 3. To attach your domain to a website, you should click on the item “Domains \WWW-domains ” in the main menu on the left bar and then click on “Add” button to set information about your domain.
Step 4. Complete “New WWW domain” form. All required fields are marked red. Enter your domain name in the first field (in my case it is mytestjoomla.com). After that most of the necessary fields will be completed automatically.
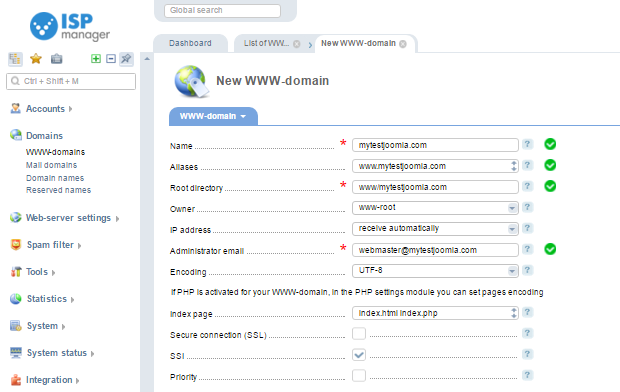
The only thing, which I recommend you to change in the default settings, is encoding. I advise you to choose the UTF8, because it is the most widespread and commonly used one.
Step 5. “In Additional features” section you can for example set PHP version, CGI-scripts, Logging, etc. After everything is dome click OK button on the bottom of the list.

Step 6. As you can see, domain is now in the list. It means that we can move to CMS deployment now

3. Installing Joomla CMS
Step 7. Let’s begin with our Joomla CMS deployment. Select “Web-server settings \ Web-scripts” on the left menu and you will see available web-scripts. And you already know which one to install, right?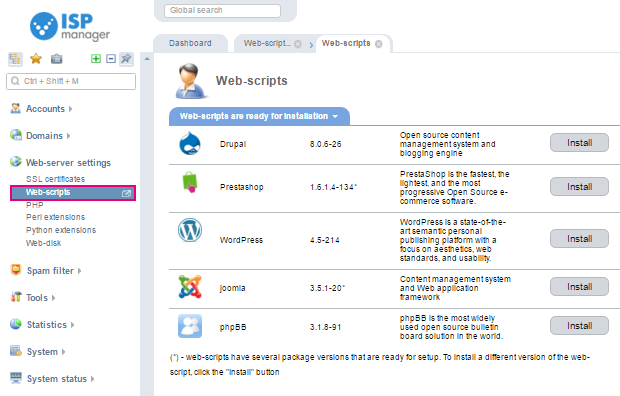
Step 8. On the next screen, which you will see, you will be able to set website’s owner (in my case it is WWW-root), the domain, which will be used for Joomla installation and the folder where your website will be located. Complete these forms and click “Next” button.
Step 9. After short waiting you will see license policy screen. Check “I have read and agree…” box and scroll the screen a bit – there will be important CMS setup fields. Fill admins login and password, his email and the title of website. Select default language. Set an email, which will be used for sending of all system mail. Select what to do with Sample data (it’s a kind of website plug that helps to see where everything be situated on a website)

Step 10. The last form which you will have to complete is Database setting. Choose Database’s name ad create a user for it. Click “Next”
Step 11. Read confirmation and click “Finish” button. That’s it! You are now have fully functional Joomla CMS on your server. If you want to check your website than you just need to enter it´s IP address in the address bar of your web browser (check it on “WWW domains” screen)
Now you have an experience working with ISPmanager and know how to install the most popular content management systems such as Joomla using this hosting control panel. Enjoy!
This post How to Install Joomla on ISPManager-based Server is part of ServerMom.

0 Response to "How to Install Joomla on ISPManager-based Server"
Post a Comment